Quickstart
Sign in to an existing OpenInspect deployment, start a session against a repository, and read the first result.
This page takes you from signing in to reading the agent's first result in one session.
Prerequisites
- Your team already runs an OpenInspect deployment and you have its URL.
- You have been admitted to the workspace. Admission is configured by the operator (allowed GitHub users, email addresses, email domains, or GitHub organization membership).
- Your role is Member or higher. Viewers can read sessions but cannot create or prompt them.
- The GitHub App for the deployment is installed on the repository you want to work in. If it is not, the repository does not appear in the picker.
- At least one model is enabled under Settings › Models, with its provider credentials configured. An administrator does this once.
Sign in
Open the deployment URL. The sign-in page shows only the providers the operator configured: GitHub, Google, or both.
Sign-in has two stages. First your identity provider verifies who you are. Then the deployment's admission rules decide whether you may join the workspace. If you land on the Access Denied page ("Your account is not authorized to use this application."), your identity was verified but admission failed. Contact an administrator of the deployment; there is nothing to fix on your side.
New users receive the Member role. Signing in with GitHub also lets pull requests be authored as you (see Your first pull request).
Start a new session
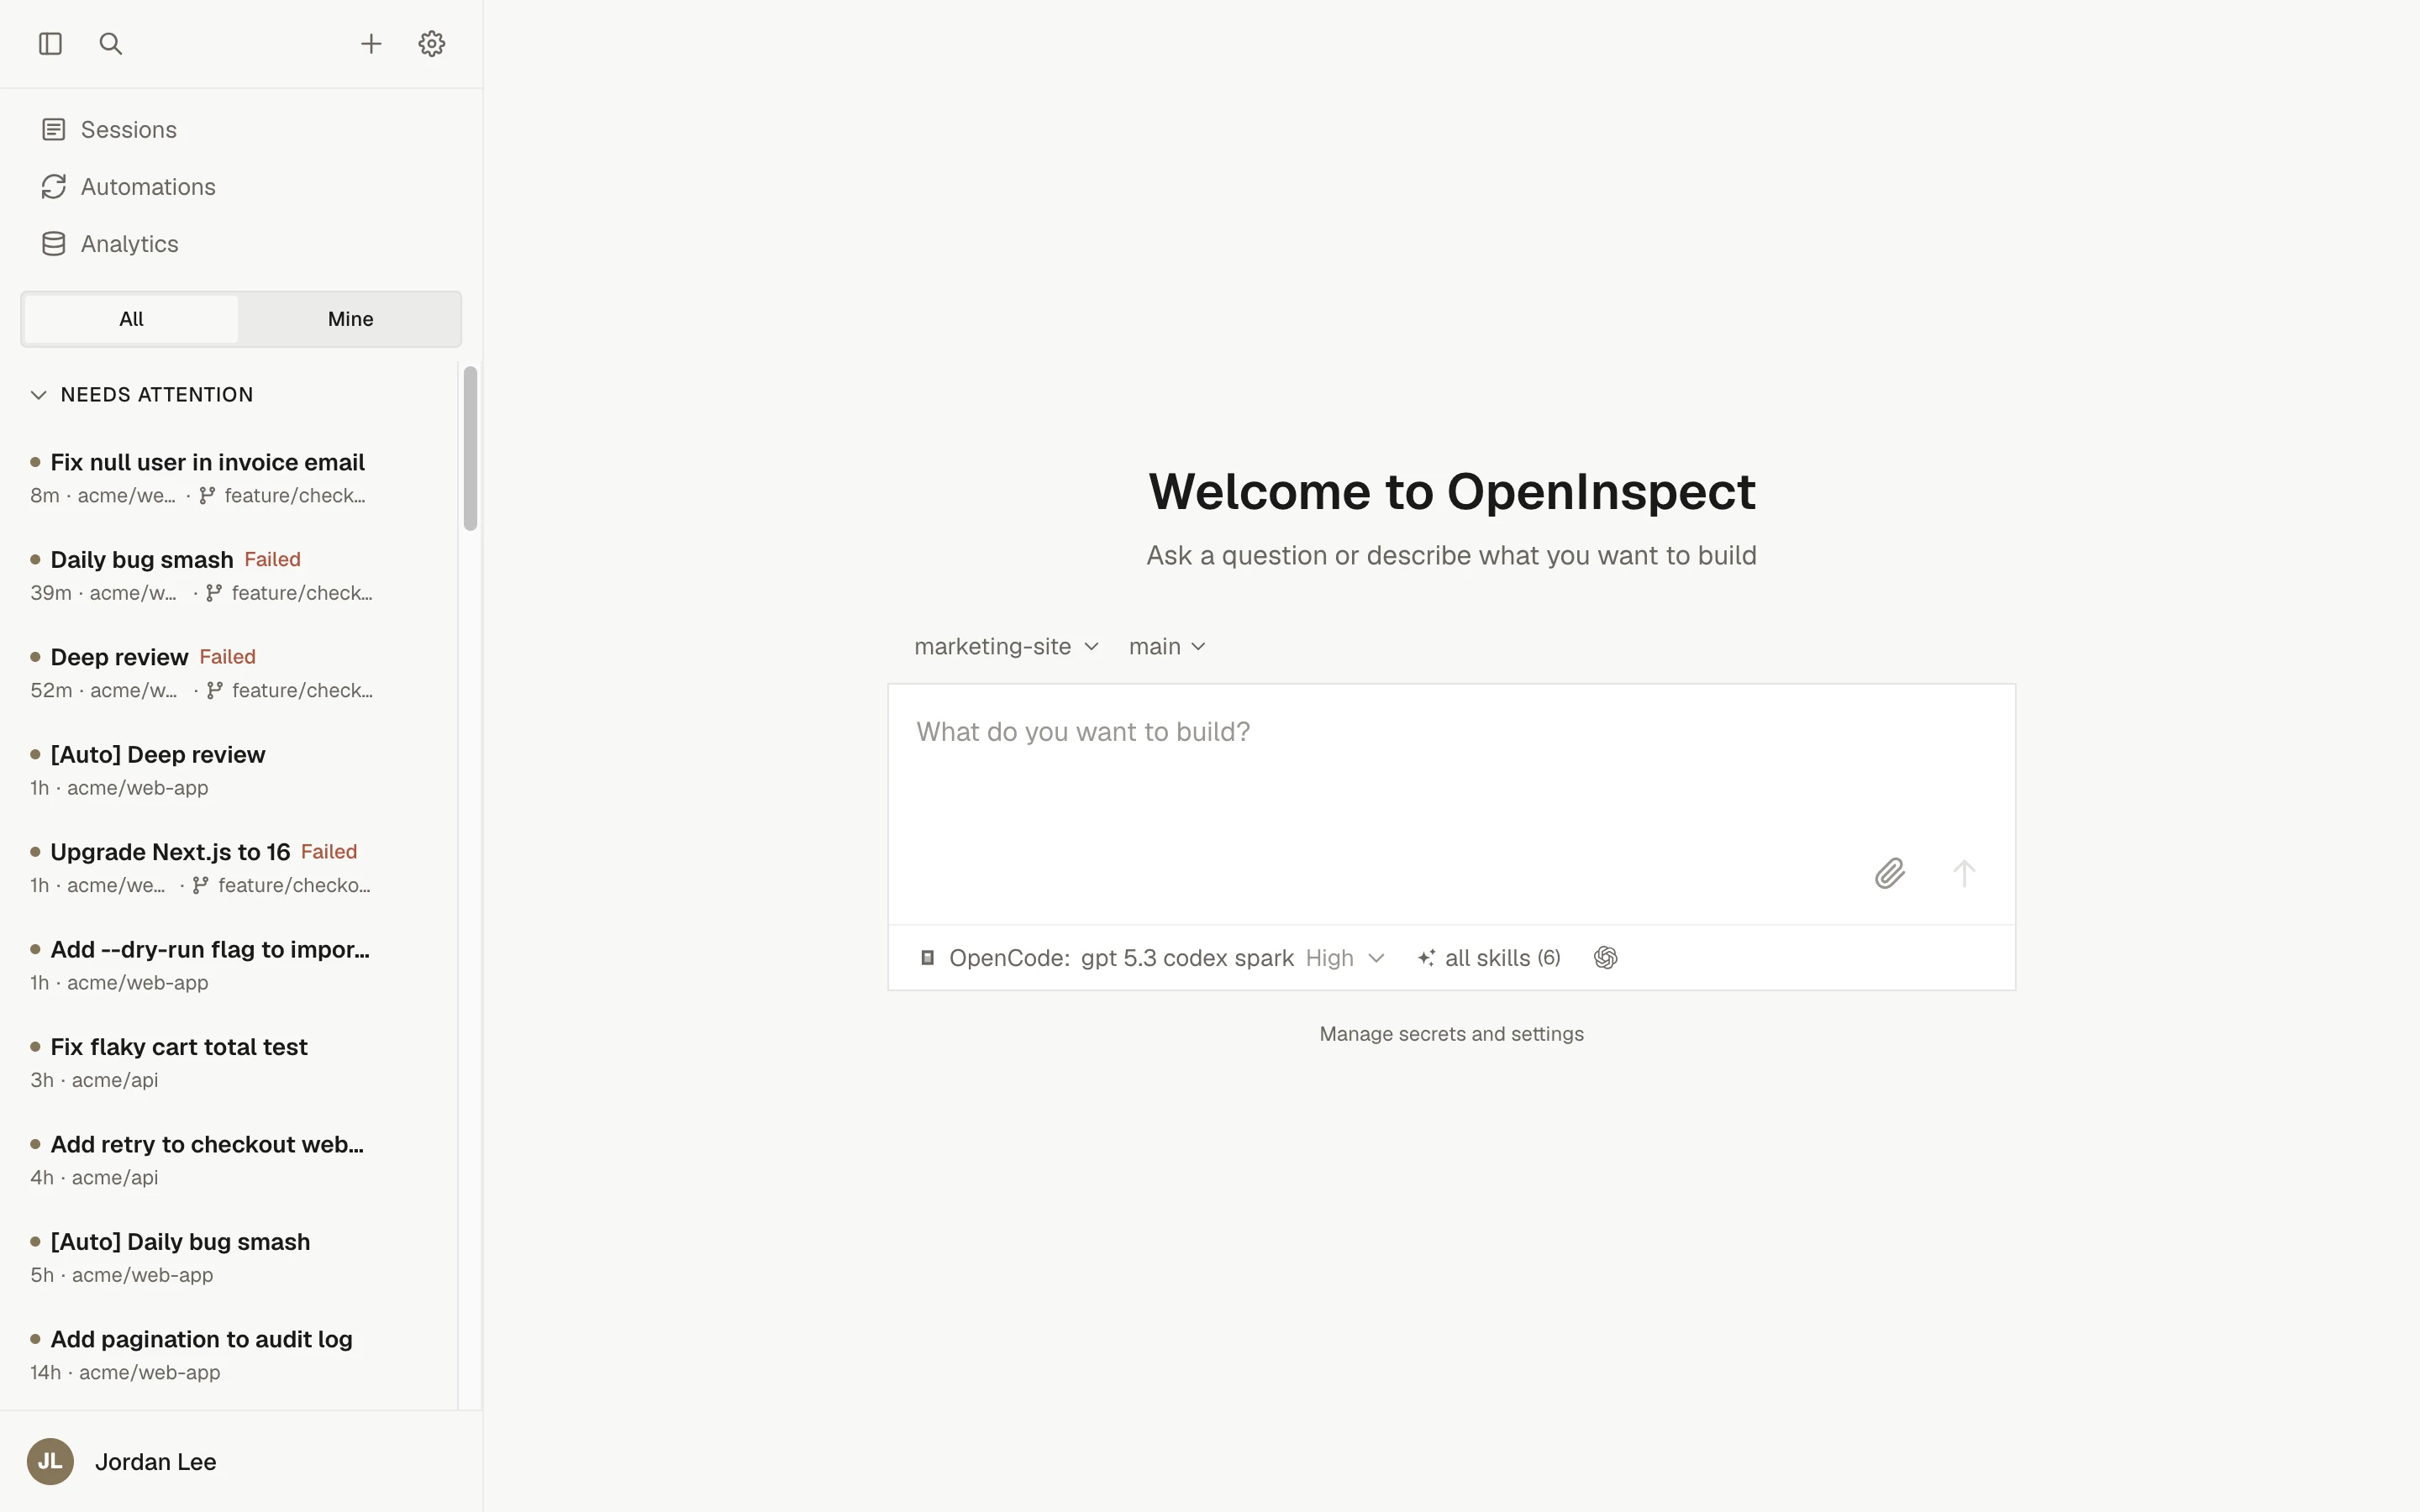
The home page is the new-session composer, headed "Welcome to" followed by the deployment's app name. The text area's placeholder reads "What do you want to build?". You can also open it from anywhere with Cmd/Ctrl+Shift+O.
Above the text area, the target picker decides what the sandbox works on. Its search field reads "Search environments and repositories...". Choose one of:
| Target | What you get |
|---|---|
| A single repository | One clone. A branch selector appears beside the picker, preselected to the repository's default branch. |
| Multiple repositories | An ad-hoc ordered set of up to 10 repositories, chosen with a "Choose repositories" control. The first is the primary. Each is cloned at its default branch. Ad-hoc sets do not get prebuilt images. |
| An environment | A saved repository set with a base branch per repository, its own secrets, and optional prebuilt images. Environments are listed first when any exist. |
| No repository | An empty sandbox for scratch work ("Start without cloning a repository"). |
Below the composer, a note states which secrets the session receives. An environment session uses global secrets plus the environment's secrets. An ad-hoc set uses global secrets plus each selected repository's secrets, and the note offers to save the set as an environment.
If the picker says "No repositories found", the GitHub App has not been installed on any repository yet. You can still start without a repository.
Choose the model and reasoning effort
The model menu sits in the composer's footer. It lists only models enabled under Settings › Models. Picking a model resets the reasoning effort to that model's default; the effort options depend on the model, and models without configurable effort show none.
The same menu has an Agent row that selects the harness:
- OpenCode is the default and runs every enabled model.
- Claude Agent runs Anthropic models only. It is the harness that can use a connected Claude account instead of an API key.
The model list is filtered to what the chosen harness can run. The harness is fixed when the session is created.
The composer remembers your last model, effort, harness, and provider choices in this browser.
If your deployment has connected provider accounts
When the selected model belongs to OpenAI, xAI, or Anthropic and the deployment has a provider account configured, a provider authentication menu appears beside the skill selector. "Use default" follows the deployment's policy; you can also pick a specific connected account or "No account" to use the API key.
Choose skills
The skill selector sits beside the model menu. Managed skills are reusable instruction files that administrators assign to repositories, environments, or globally.
| Selection | Result |
|---|---|
| All applicable | Every enabled skill whose assignment matches the target. This is the default. |
| None | "Start without managed skills." |
| Personal profile | The enabled, applicable skills saved in one of your profiles. |
The number beside the selector previews how many skills will be installed. Skills are pinned at session creation; a later edit to a skill does not change an existing session. See Managed skills.
Attach images if useful
Click the paperclip ("Attach images"), paste, or drag files onto the composer. Accepted formats are PNG, JPEG, WebP, and GIF, up to 6 images per message and 10 MiB each. Attachments are useful for a screenshot of a bug, a design mock, or an error dialog. See Attaching images.
Send a bounded first request
A good first prompt names one outcome, the place in the code it concerns, and how the agent should verify the result. Keep the scope small enough to review in a few minutes. Good vs. bad prompts shows the difference for eight common task types.
In packages/web, the "Copy link" button on the session header does not show any confirmation after copying. Add a brief "Copied" state on the button for two seconds after a successful copy, matching how the branch-name copy button in the sidebar behaves. Add or update the component test, run the web test suite for the files you touched, and report the command you ran and its result. Do not open a pull request yet.Send with the send button or Cmd/Ctrl+Enter. Typing in the composer already starts warming a sandbox ("Warming sandbox..." appears beside the send button), so the session is often ready by the time you send. You are taken to the session page at /session/<id>.
Watch the boot
The session header names each boot phase as it runs:
- Starting runtime
- Cloning repository (all repositories in a multi-repository session)
- Running setup.sh (
.openinspect/setup.sh, if the repository has one; skipped when starting from a prebuilt image) - Starting services (
.openinspect/start.sh, if present) - Installing skills
- Starting agent
Multi-repository sessions add the repository name, as in "Running setup.sh for acme/api". A setup.sh failure is reported as a warning and the boot continues; the status popover says which phase failed.
Your prompt waits until the sandbox reports ready, then runs. Closing the browser does not stop the session: the sandbox keeps working, and the session page catches up when you return.
Read the result
When the turn ends, three things tell you what happened:
- The final response in the timeline. The agent should state what it changed, what it ran, and anything it could not finish.
- Changes in the right sidebar and the changes panel, which compares the working tree with session start. Use the previous and next file controls and the layout toggle to read the diff.
- Validation evidence in the timeline: the commands the agent ran and their output, and any screenshots it captured under Media.
If the result is not what you wanted, send a follow-up in the same session. The sandbox state, including installed dependencies and the branch, is preserved.
Troubleshooting
| Symptom | Cause | Fix |
|---|---|---|
| Access Denied page after signing in | Your identity was verified but the deployment's admission rules did not include you. | Ask a workspace Owner or Administrator to add you (GitHub user, email, domain, or organization), then sign in again. |
| "You don't have permission to create sessions." | Your role is Viewer. | Ask a workspace Owner or Administrator to change your role under Settings › Workspace access. |
| "No repositories found." | The GitHub App is not installed on any repository. | Start without a repository, or ask the operator to install the App on the repositories you need. |
| Send button disabled with "Select at least one repository" | Multiple repositories is selected but the set is empty. | Choose at least one repository, or switch to a single repository or No repository. |
| Model menu is empty or the send fails with a model availability message | No enabled model can run on the selected harness. | Switch the harness to OpenCode, or ask a workspace Owner or Administrator to enable a model under Settings › Models. |
| Boot stops with a failed phase | start.sh in the primary repository exited non-zero, or the boot exceeded its budget. | Read the header's status popover for the phase, fix the script, and send the prompt again to start a new sandbox. |
Next steps
OpenInspect documentation
What OpenInspect does, how a session runs from prompt to pull request, and where each part of the product is documented.
Your first pull request
Ask the agent for a pull request, understand how OpenInspect creates and updates it, and review it with your normal repository policy.