Create your first automation
Build a weekly scheduled automation that opens a dependency-update pull request, test it with Trigger Now, and read its run history.
This tutorial walks you through a scheduled automation that opens a dependency-update pull request every Monday morning, then shows you how to test it and read the results.
Prerequisites
- A workspace role of Member, Administrator, or Owner. Viewers cannot create automations.
- A repository the GitHub App is installed on. Only those repositories appear in the picker.
- At least one enabled model under Settings › Models that your chosen harness can run.
Open the create form
Open Automations in the sidebar and click Create Automation. If you would rather start from a pre-filled example, click Browse templates instead and choose one; the same form opens with fields already filled in (see Automation templates).
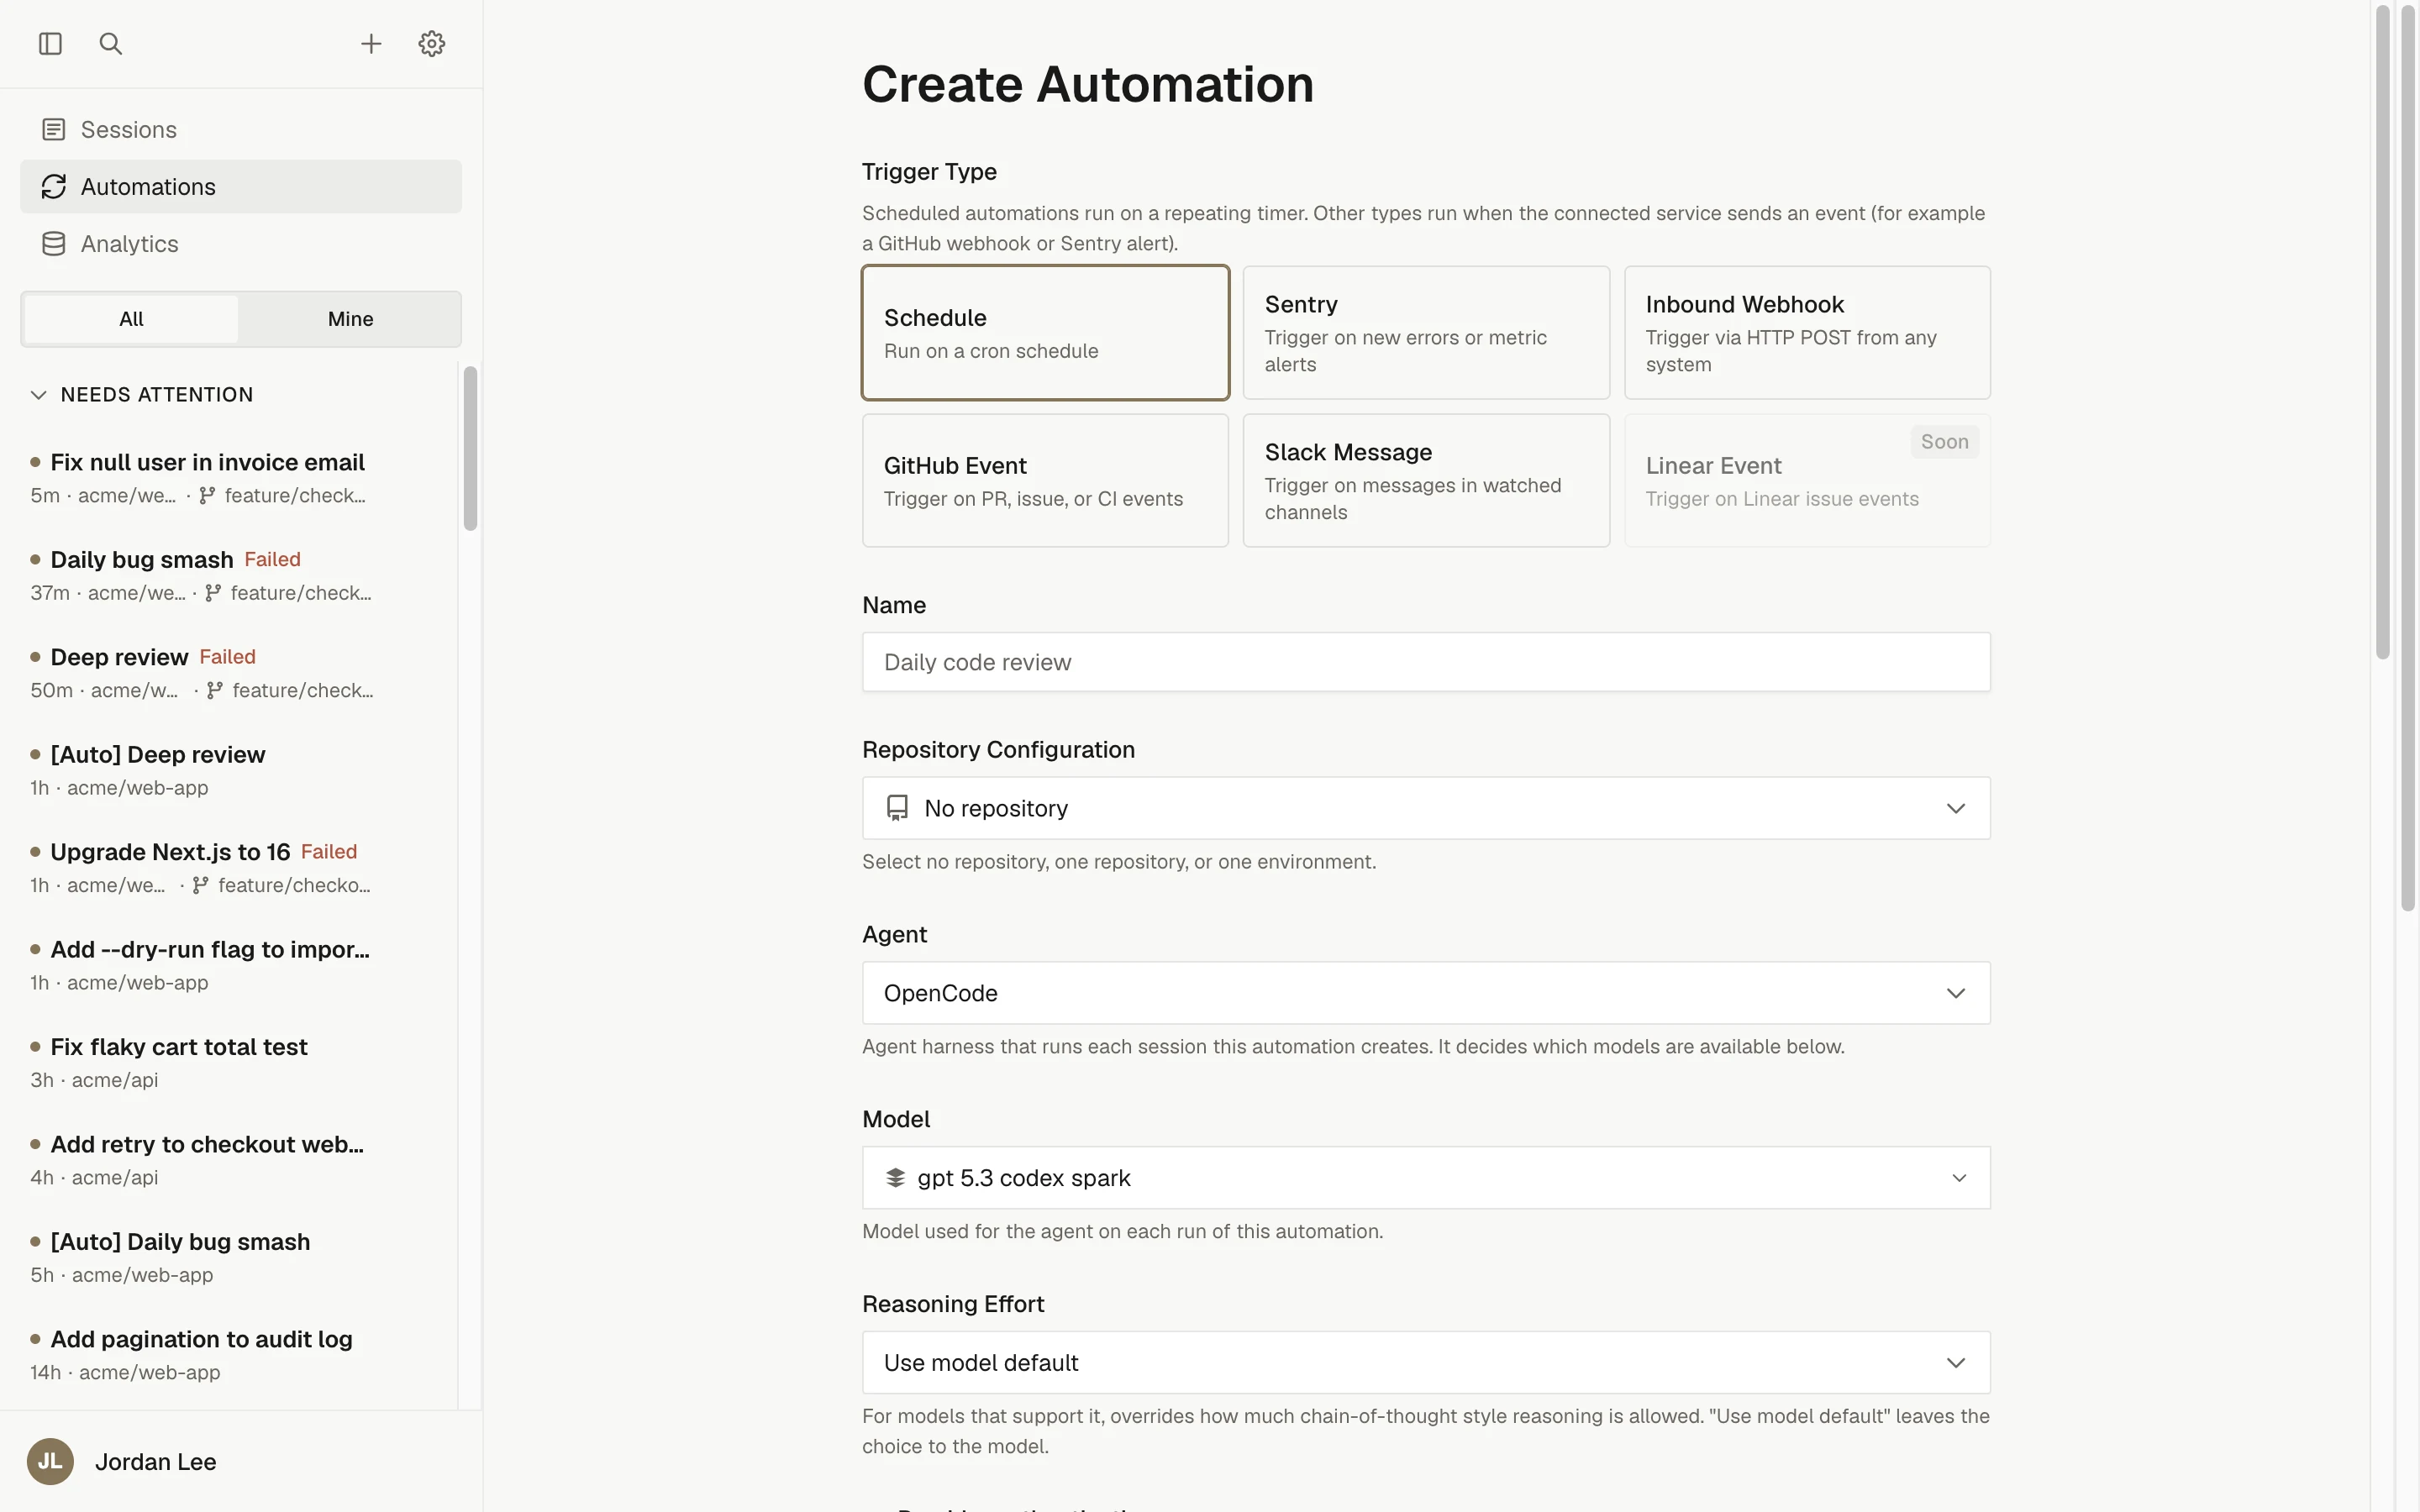
Choose the Schedule trigger
Under Trigger Type, select Schedule. The form adjusts to the trigger you pick: schedule triggers show a schedule and timezone, event triggers show an event type and conditions instead.
The trigger type cannot be changed after the automation is created.
Name it
Enter a Name of up to 200 characters, for example Weekly dependency updates. The name appears in the automations list and in every session this automation creates, prefixed with [Auto].
Pick one repository and a branch
Under Repository Configuration, select one repository. A Branch field appears; it defaults to the repository's default branch and is the branch each run checks out. Selecting a different repository resets the branch to that repository's default.
Schedule triggers also accept several repositories or environments. Leave that for later; see Multi-repository automations.
Choose the agent, model, and provider authentication
- Agent: the harness that runs each session, OpenCode or Claude Agent. It decides which models are listed below. See Agent harnesses.
- Model: the model used on every run. Only models enabled under Settings › Models that the harness can run are listed.
- Reasoning Effort: for models that support it, pick a level or leave Use model default.
- Provider authentication: for each subscription-capable provider, either keep Use defaults when each run starts (the provider's configured unattended mode is resolved at run time) or pin a specific connected account or API-key mode. Pins survive model changes and apply only to future sessions. Anthropic account pins reach only Claude Agent automations; OpenCode uses the API key. See Provider accounts.
Write the instructions
Instructions is the prompt sent to the agent on every run (up to 15,000 characters). Write it the way you would write a normal session prompt: outcome, boundaries, and what "done" looks like.
Update this repository's dependencies.

1. Run the package manager's outdated check (for example `npm outdated`)
   and list minor and patch updates that are available.
2. Apply the minor and patch updates only. Do not apply major version
   bumps; list them in the PR description instead.
3. Run the project's test suite and typecheck. If something fails because
   of an update, revert that single package and note it in the PR.
4. Open one pull request titled "chore: weekly dependency updates" with
   a table of every package changed (old version, new version) and the
   list of skipped major updates.

If nothing is outdated, do not open a pull request.
See Writing prompts for the general pattern.
Set the schedule and timezone
Under Schedule, pick Weekly, choose Monday, and choose 9:00 AM. The picker shows a plain-language description of the schedule and a Next run preview beneath the controls.
Under Timezone, the form defaults to your browser's timezone. Change it if the schedule should follow a different region; "9:00" means 9:00 local time in the selected zone. Presets and custom cron expressions are covered in Schedules.
Save
Click Create Automation. You land on the automation's detail page, which shows the trigger, schedule, timezone, next run, and an empty Run History ("No runs yet.").
Test it with Trigger Now
Click Trigger Now on the detail page. A run starts immediately under your own authority, and the scheduled next run does not move. If it is rejected, a run is already active; the full rules are in Schedules.
Read the run history
Each firing is one row in Run History with a status badge, the session title, the duration, and a View session link. Click View session to open the full session, watch the agent, and review its diff and pull request. Older rows load with Load more.
If a run fails, the failure reason appears under the row.
Pause, resume, edit, or delete
- Pause stops the automation from firing; Resume turns it back on and recalculates the next run from now. Both are available from the list and the detail page.
- Edit changes the name, repository selection, branch, agent, model, instructions, schedule, and timezone. Changing the schedule or timezone recalculates the next run automatically. Editing the repository selection while a run is active does not affect that run; the next firing uses the new selection.
- Delete asks for confirmation ("Delete automation?"), then stops all future runs. Existing run history and the sessions it created are preserved.
Troubleshooting
| Symptom | Cause | Fix |
|---|---|---|
| The Create Automation button stays disabled | A required field is empty, the schedule is invalid, or no enabled model is compatible with the selected harness | Fill in the name and instructions, check the cron picker's validation message, or enable a compatible model under Settings › Models |
| The repository you want is not in the picker | The GitHub App is not installed on it | Ask an operator to add it to the installation; see GitHub integration |
| A scheduled run never starts | The owner lost access to the repository, or was suspended | Scheduled runs use the owner's authority; restore access or recreate the automation under another account |
| The badge says Degraded or the automation paused itself | Three consecutive failures | Open a failed run's View session, fix the cause, use Trigger Now to verify, then Resume |